


Integrated Valve Cover Gasket with Injector Wiring Harness Installation Instructions
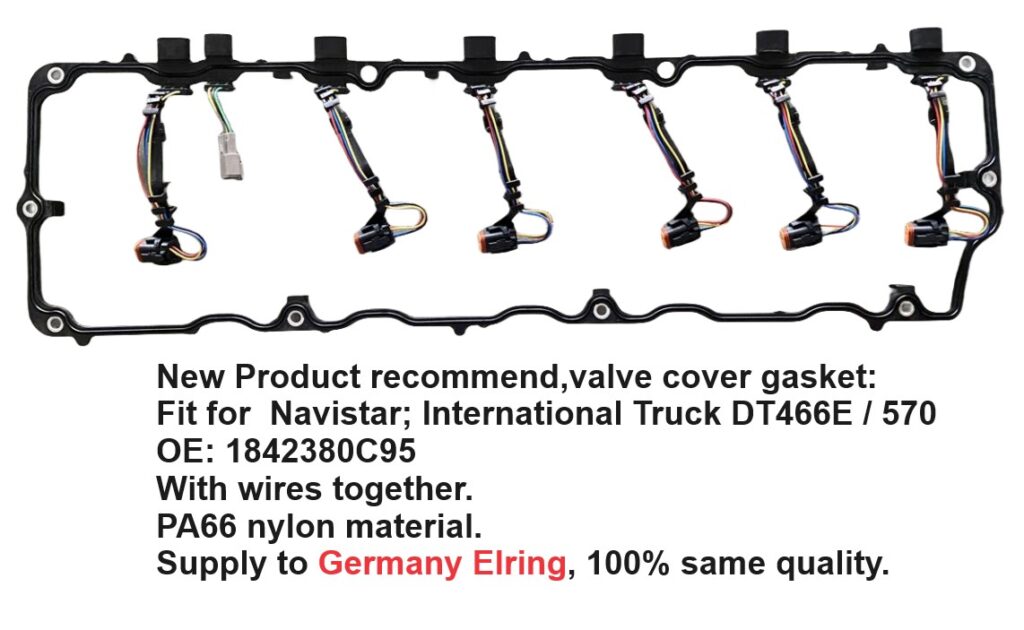
Product Name: Integrated Valve Cover Gasket with Under-Gasket Injector Wiring Harness
Application: Navistar / International Truck DT466E & DT570
OEM Part Number: 1842380C95
1. Engine OFF Ensure the engine is shut off, the key is removed, and the vehicle is securely parked with wheels chocked.
2. Cool Down Allow the engine to cool down completely before performing service to avoid severe burns from hot oil or components.
3. Battery Disconnect (CRITICAL) Disconnect both negative battery cables. The Injector Drive Module (IDM) pulses up to 115V DC. Working on live wiring can result in severe electric shock or permanent damage to the ECM/IDM modules.
1. Disconnect the main external engine wiring harness plug from the valve cover gasket pass-through connector.
2. Remove the valve cover retaining bolts following the manufacturer’s recommended sequence. Carefully lift and remove the valve cover from the cylinder head.
3. Carefully unplug the 6 internal injector connector plugs and any glow plug/sensor connectors underneath the cover.
4. Remove the old valve cover gasket along with the attached wiring harness. Discard responsibly according to local environmental regulations.
1.Thoroughly Clean: Use a clean shop towel and degreaser to thoroughly clean the cylinder head gasket sealing surface. The surface must be 100% dry, clean, and completely free of old silicone, oil film, or debris.
2. Inspect Connectors: Inspect the terminal pins on the fuel injectors for any signs of corrosion, melting, or oil contamination. Clean with electrical contact cleaner or replace components if necessary.
1. Pre-position: Lay the new integrated gasket/harness onto the cylinder head rail, carefully aligning all bolt holes and routing the internal wire harness sections toward the fuel injectors.
2. Connect Injectors: Firmly push the 6 internal wire connectors onto their respective injectors. Ensure you hear an audible “Click” or feel the locking tab engage securely.
3. Route Harness: Verify that the wire bundles are neatly routed and NOT pinched or rubbing under any moving valve train components (such as rocker arms or pushrods).
4. Apply Sealant: Apply a small dot of high-temperature RTV silicone sealant at the T-joints or corner transitions where the cylinder head meets the front and rear engine covers.
1. Place the valve cover back over the new gasket, ensuring it sits perfectly flat without shifting the gasket alignment.
2. Hand-start all valve cover bolts to prevent cross-threading or stripping.
3. Torque Pattern: Torque all valve cover bolts in a crisscross (star) pattern starting from the center and moving outwards to OE specifications. Recommended Torque: 13 ft-lbs (approx. 18 N·m / 156 in-lbs) (Please verify precise tolerances with your specific model service manual)
4. Reconnect the external main engine wiring harness to the new gasket’s external pass-through plug. Ensure the outer locking collar or tab is fully engaged.
1. Reconnect the negative battery cables.
2. Start the engine and allow it to idle for 5–10 minutes. Perform a rigorous visual check for any active oil leaks around the entire perimeter of the valve cover.
3. Use a diagnostic scan tool to check for any active misfire codes or injector circuit faults to confirm perfect electrical connectivity and performance.